Over the years, I have talked with a lot of people who knew they needed to prepare but had no idea where to start.
They had watched videos, read survival blogs, and looked through catalogs filled with freeze-dried food, tactical gear, solar generators, bug-out vehicles, firearms, medical kits, water filters, and enough expensive equipment to fill a warehouse.
Instead of helping them get prepared, all that information left them overwhelmed.
Here is what I usually tell people:
You do not need thousands of dollars or a shipment from a specialty survival company to begin preparing.
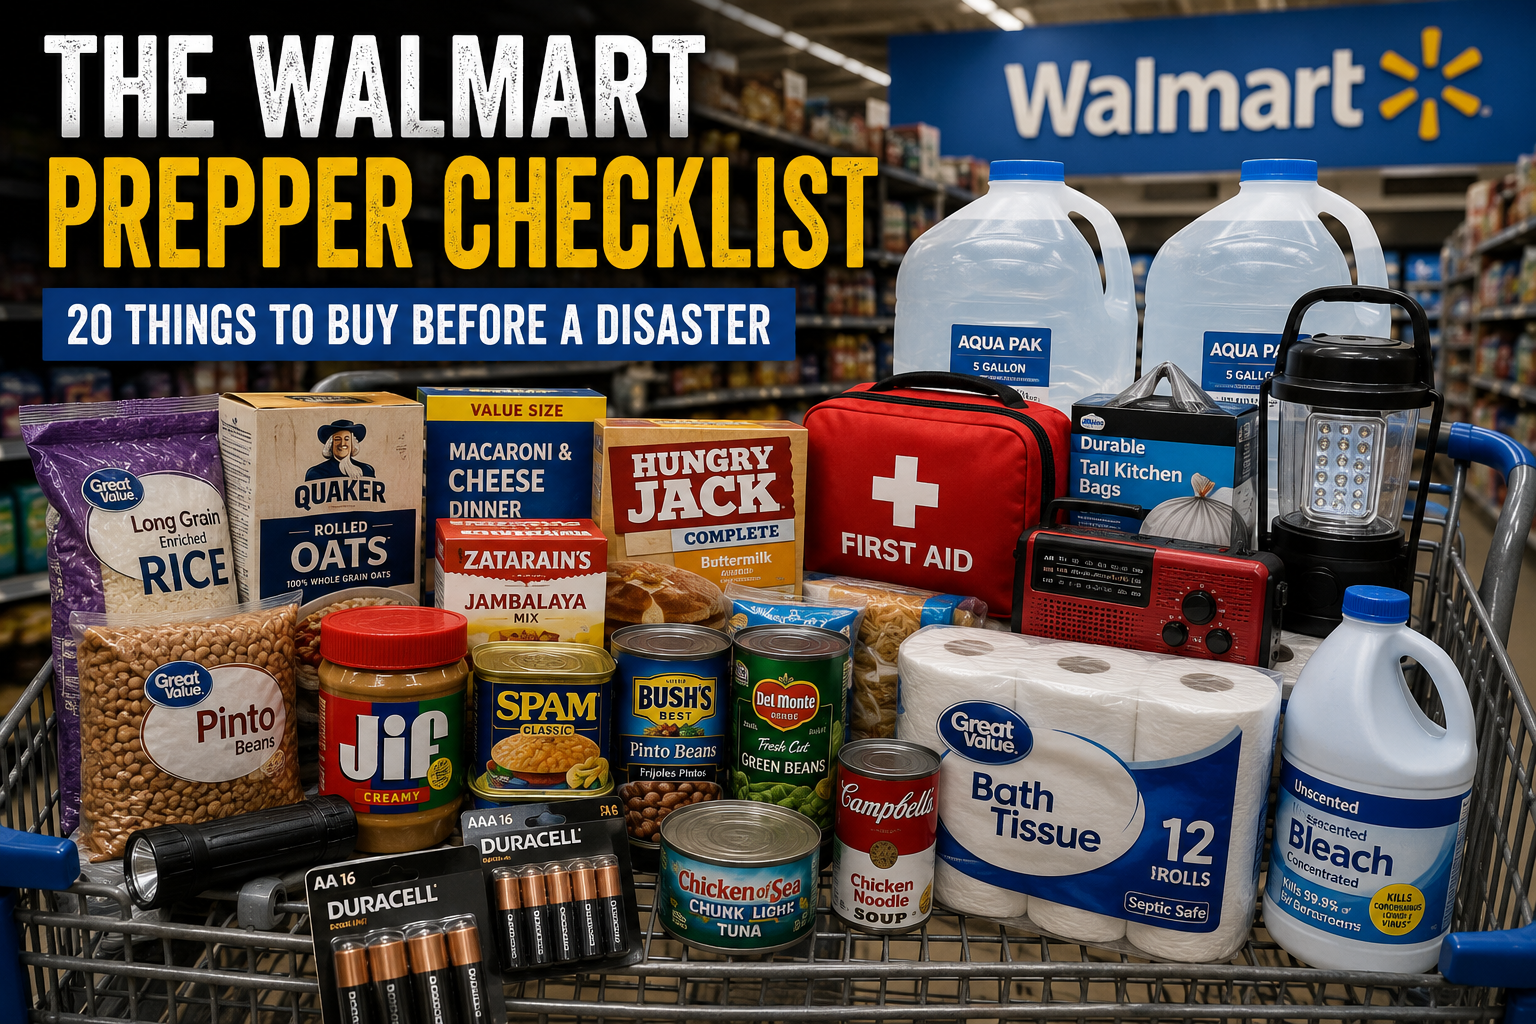
Most of the basic food, water containers, medical supplies, tools, lighting, sanitation equipment, and emergency gear needed to get started can be purchased during one trip to Walmart or another large local store.
That does not mean specialty preparedness products are worthless. I own and recommend some of them myself.
It means you should not allow the price of premium gear to keep you from doing anything.
A pantry full of ordinary food you eat is better than an empty pantry while you save for a pallet of freeze-dried meals.
A basic flashlight is better than sitting in the dark because you have not purchased the most expensive tactical light available.
Four food-grade water containers are better than waiting until you can afford a massive water-storage system.
This 20-step Walmart prepper checklist will not complete every possible preparedness plan. It will, however, give you a solid starting point and leave you better prepared than most households.
You can buy everything at once, complete one section each payday, or spread the purchases across several months.
The important thing is to begin.
Before You Start Shopping
Keep four basic rules in mind:
- Buy what you already use. An emergency is not the time to discover that your family hates the food you stored.
- Date and rotate everything. Use the oldest items first and replace them during normal grocery trips.
- Adjust quantities for your household. A single adult, a family of six, an infant, an elderly parent, and three large dogs have very different needs.
- Do not create debt trying to prepare overnight. A few useful supplies purchased consistently will add up faster than you think.
1. Start With Rice and Beans
Head to the grocery department and begin with two of the least expensive long-term food staples available:
- 20 pounds of white rice
- 20 pounds of dried beans
Pinto beans are inexpensive and widely available, but you can also choose black beans, navy beans, kidney beans, lentils, split peas, or a mixture.
White rice generally stores longer than brown rice. Brown rice contains more natural oils and should be purchased in smaller amounts and rotated more frequently.
Do not buy 40 pounds of rice and beans if no one in your home will eat them.
Buy smaller quantities, cook several meals with them, and learn which seasonings and recipes your family likes.
Rice and beans provide a useful foundation, but they are not a complete emergency diet by themselves.
2. Add Basic Baking and Pantry Staples
Add:
- Five pounds of rolled oats
- Five to ten pounds of flour
- Five pounds of cornmeal
- Five pounds of sugar
- Five pounds of iodized salt
- Several pounds of pasta
- Dry pancake or biscuit mix
- Baking powder and baking soda
Flour, cornmeal, and other ground grains do not store forever. Buy amounts you can rotate through your normal cooking.
Whole grains, wheat berries, and professionally packaged long-term food may be added later.
For now, the goal is to build a working pantry—not a museum filled with food no one touches.
3. Buy Cooking Oil and Other Fats
Calories from fat are important, but cooking oils have a limited storage life.
Instead of buying one giant container that may become rancid after opening, consider several smaller bottles.
Possible choices include:
- Olive oil
- Canola oil
- Vegetable oil
- Coconut oil
- Shortening
Buy the type you normally use, check the dates, keep it cool and dark, and rotate it regularly.
Other shelf-stable sources of fat and calories include peanut butter, nuts, canned meat, and some powdered dairy products.
4. Stock Canned Fruits and Vegetables
Buy approximately 20 cans of fruit and 20 cans of vegetables as a starting point.
Choose foods your family already eats, such as:
- Green beans
- Corn
- Peas
- Carrots
- Potatoes
- Tomatoes
- Mixed vegetables
- Peaches
- Pears
- Pineapple
- Applesauce
- Fruit cocktail
Canned foods are especially useful during short-term emergencies because they are already cooked and can usually be eaten without heating.
The liquid in canned fruit and vegetables may also provide a small amount of additional usable fluid.
Avoid badly dented, leaking, swollen, or deeply rusted cans.
5. Add Canned Meat and Complete Meals
Protein is one of the more expensive parts of an emergency food supply, but ordinary canned products are still usually cheaper than specialty survival meals.
Choose a mixture of:
- Tuna
- Salmon
- Chicken
- Spam or luncheon meat
- Vienna sausages
- Chili
- Beef stew
- Soups
- Canned beans
- Ravioli or pasta meals
Buy only shelf-stable cans and packages. Some canned meat and seafood products still require refrigeration and will say so on the label.
Include several meals that can be opened and eaten without cooking.
Do not forget at least two manual can openers.
6. Buy Calorie-Dense Foods That Require No Cooking
Peanut butter is one of the simplest emergency foods available.
It provides protein, fat, and a lot of calories in a small amount of space.
Add:
- Two large jars of peanut butter
- Crackers
- Granola or breakfast bars
- Nuts
- Dried fruit
- Trail mix
- Honey
- Shelf-stable cheese products
These foods are useful when the power is out, cooking fuel is limited, or you need to eat quickly.
Peanut butter and other foods containing oils should be rotated rather than forgotten in the back of a closet for ten years.
7. Add Drinks, Electrolytes, and Comfort Items
Plain water is the most important drink, but flavoring can make treated or stored water easier to consume.
Consider:
- Powdered drink mix
- Electrolyte packets
- Instant coffee
- Tea
- Hot chocolate
- Powdered lemonade
- Shelf-stable juice
Electrolyte or oral-rehydration products may be particularly helpful during heavy work, hot weather, vomiting, or diarrhea.
Coffee, tea, and familiar comfort drinks can also improve morale during a stressful emergency.
If someone in your household normally consumes a lot of caffeine, remember that suddenly going without it can cause headaches and irritability.
8. Consider Vitamins and Special Dietary Needs
A basic multivitamin may be useful when the diet becomes limited, but supplements do not replace food.
Buy only products your household can safely use and rotate them before they become excessively old.
More importantly, account for:
- Infant formula and baby food
- Food allergies
- Diabetes
- Kidney disease
- Low-sodium diets
- Gluten intolerance
- Difficulty chewing or swallowing
- Religious dietary restrictions
- Pet food
An emergency food supply is useless to a person who cannot safely eat it.
9. Store an Emergency Water Supply
Food gets most of the attention, but water is the more immediate need.
A practical starting point is at least one gallon of water per person per day for a minimum of three days.
Work toward a two-week supply when space and finances allow.
Store additional water for:
- Hot climates
- Pregnant women
- Sick household members
- Pets
- Cooking
- Basic hygiene
Four five-gallon containers provide 20 gallons.
That is approximately:
- 20 days for one person at one gallon per day
- 10 days for two people
- Five days for a family of four
Use food-grade water containers rather than fuel cans, chemical buckets, or containers that previously held anything toxic.
Label each container with the filling date.
Water filled from your home supply should generally be replaced every six months unless you are using a storage and treatment method that specifies otherwise.
Store it away from sunlight, gasoline, pesticides, and other chemicals.
10. Add Water Treatment and Filtration
Stored water is your first line of defense, but you also need a way to treat additional water.
Look in the camping aisle for:
- A portable water filter
- Water-purification tablets
- Clean food-grade containers
- Coffee filters or clean cloth for prefiltering cloudy water
Add a bottle of ordinary, unscented household chlorine bleach whose label states that it contains 5% to 9% sodium hypochlorite.
Do not use scented, color-safe, gel, or splashless bleach for emergency drinking-water treatment.
CDC guidance for clear water and ordinary 5%–9% unscented bleach is eight drops per gallon, followed by mixing and a wait of at least 30 minutes. Cloudy, discolored, murky, or very cold water requires additional steps and a different amount.
Because products and concentrations vary, keep a printed copy of the current CDC emergency-water instructions with your supplies.
Boiling is generally the best way to kill germs when fuel and equipment are available.
Water contaminated with fuel, pesticides, toxic chemicals, or radioactive material cannot be made safe simply by boiling, filtering, or adding bleach.
11. Buy a Safe Emergency Cooking System
A two-burner propane camp stove is a useful emergency-cooking tool.
Add:
- A propane camp stove
- Several one-pound propane cylinders
- Long matches
- Multipurpose lighters
- Heat-resistant gloves
- A sturdy cooking pot
- A basic skillet
A larger refillable propane cylinder may be more economical, but use only a hose, regulator, and adapter approved for the exact stove and cylinder.
Portable propane camping stoves and outdoor cookers must be used outdoors.
Do not use an outdoor camp stove inside:
- Your house
- A garage
- A basement
- A tent
- An RV
- A shed
- An enclosed porch
Opening a window or garage door does not make an outdoor stove safe indoors.
Keep propane cylinders upright and follow the storage instructions on the cylinder and appliance labels.
Include food that requires no cooking so you do not have to burn fuel at every meal.
12. Add Lighting and Backup Power
Buy at least:
- Two LED flashlights
- One LED headlamp
- Extra batteries
- Battery-powered lanterns
- A USB power bank
- Charging cables for your devices
A headlamp is especially useful because it leaves both hands free for repairs, cooking, first aid, and other work.
Try to standardize your battery sizes. It is easier to stock AA and AAA batteries than six different uncommon types.
Rechargeable batteries and a small solar charger may be added later, but ordinary alkaline batteries are a simple place to begin.
Avoid relying on candles as your primary emergency lighting. They create a fire hazard and produce very little usable light compared with modern LED lanterns.
13. Prepare Emergency Communications
Go to the electronics or sporting-goods department and look for:
- A battery-powered AM/FM radio
- A weather-alert radio
- Extra batteries
- Two-way radios
- A car charger
- A written list of important telephone numbers
A radio that receives NOAA weather alerts is more useful for most local disasters than a radio with only entertainment stations.
Shortwave reception can be useful during widespread emergencies, but it is an addition—not a replacement for local radio and weather alerts.
Two-way radios can help family members communicate around a property, neighborhood, campsite, or evacuation convoy.
Do not assume the advertised maximum range will be achieved in hills, woods, buildings, or towns.
14. Build a Practical First-Aid and Medicine Supply
Buy the best basic first-aid kit you can afford, then open it and see what is actually inside.
Many inexpensive kits contain dozens of tiny adhesive bandages and very little for a serious injury.
Add:
- Assorted adhesive bandages
- Sterile gauze pads
- Rolled gauze
- Medical tape
- Elastic bandages
- Nonstick dressings
- Nitrile gloves
- Medical scissors
- Tweezers
- Digital thermometer
- Saline wound wash
- Burn dressings
- A basic splint
- First-aid manual
Possible over-the-counter medicine categories include:
- Pain and fever relief
- Oral antihistamine
- Anti-diarrheal medicine
- Constipation relief
- Antacids
- Cough and cold medicine
- Hydrocortisone cream
- Antifungal cream
- Oral rehydration packets
Buy only medicines the people in your home can use safely.
Read labels, watch for duplicate ingredients, and ask a pharmacist about interactions with existing medications and medical conditions.
15. Address Prescription Medicines and Personal Medical Needs
If someone depends on a prescription, inhaler, insulin, medical device, or other essential treatment, that item is more important than another case of canned beans.
Talk with the doctor, pharmacist, and insurance provider about maintaining the largest legal emergency reserve available to you.
Keep a written list containing:
- Medication names
- Generic names
- Dosages
- Schedules
- Known allergies
- Doctor information
- Pharmacy information
Also stock:
- Spare eyeglasses
- Hearing-aid batteries
- Denture supplies
- Blood-glucose testing supplies
- Medical-device batteries
- Prescribed epinephrine auto-injectors
- Mobility-aid supplies
Do not wait until a storm warning is issued to discover that you have only two doses remaining.
16. Buy Hygiene Supplies
Personal hygiene becomes more important—not less important—when normal services fail.
Add:
- Soap
- Shampoo
- Toothbrushes
- Toothpaste
- Dental floss
- Deodorant
- Razors
- Hand sanitizer
- Wet wipes
- Menstrual products
- Diapers and baby wipes when needed
- Laundry detergent
A traditional double-edge safety razor and spare blades can be an economical long-term option, but ordinary disposable razors are fine if that is what you already use.
Store enough menstrual and incontinence products for longer than you think the disruption will last.
17. Prepare an Emergency Toilet and Sanitation Kit
Eventually, everyone has to use the bathroom.
A water outage, sewer failure, frozen pipe, or damaged septic system can make the household toilet unusable.
Buy:
- A five-gallon bucket
- A snap-on toilet seat or portable camping toilet
- Heavy-duty garbage bags
- Absorbent material such as cat litter or sawdust
- Toilet paper
- Disposable gloves
- Soap and hand sanitizer
- Lidded waste containers
If the water supply is off but the sewer or septic system is still functioning, a toilet may sometimes be flushed by pouring water directly into the bowl.
Do not continue flushing if the sewer is backed up, the septic system is flooded, or local authorities say wastewater systems are not working.
Surface water from a pond, lake, or stream may be suitable for toilet flushing, but it should be kept separate from drinking water and handled as contaminated water.
18. Add Cleaning and Disposable Supplies
Buy:
- Regular unscented household bleach
- Dish soap
- Household disinfectant
- Heavy-duty garbage bags
- Paper towels
- Disposable plates and bowls
- Plastic utensils
- Aluminum foil
- Food-storage bags
- Rubber or nitrile cleaning gloves
Disposable dishes can conserve water during a short emergency.
Do not go overboard. They create a large amount of trash during a long disruption.
Bleach loses strength over time, so rotate it.
Never mix bleach with ammonia, acids, vinegar, toilet-bowl cleaner, or any other cleaning product.
Mixing cleaning chemicals can release dangerous gases.
19. Assemble a Basic Tool and Repair Kit
Move to the hardware department and add:
- Claw hammer
- Adjustable wrench
- Slip-joint pliers
- Locking pliers
- Screwdriver set
- Utility knife and spare blades
- Duct tape
- Electrical tape
- Work gloves
- Safety glasses
- Pry bar
- Hacksaw
- Hand saw
- Hatchet or ax when appropriate
- Lubricating or penetrating oil
- Extension cords rated for the intended use
- Assorted screws, nails, wire, and zip ties
This will not replace a complete workshop, but it will let you handle many basic repairs.
Learn how to shut off:
- Your water
- Your electricity
- Your natural-gas or propane supply
Keep the correct shutoff tools where they can be reached quickly.
20. Cover Security, Documents, Cash, and Special Needs
Preparedness is more than food and flashlights.
Finish the first shopping trip by addressing the items most likely to be forgotten.
Personal Security
Add:
- Quality door and window locks
- Motion lights
- Whistles
- Fire extinguishers
- Smoke alarms
- Carbon monoxide alarms
If you already own a firearm and it is part of your security plan, purchase the correct ammunition, safe storage equipment, eye and hearing protection, and a cleaning kit where legally available.
Training and secure storage are more important than simply owning another firearm.
Documents and Emergency Cash
Keep copies of:
- Identification
- Insurance information
- Medical information
- Property records
- Vehicle information
- Emergency contacts
- Prescriptions
Store paper copies in a waterproof pouch.
Keep a reasonable amount of emergency cash in small bills. Card systems and ATMs may not work during a power or communications outage.
Children, Elderly Family Members, and Pets
Account for:
- Formula
- Diapers
- Comfort items for children
- Mobility equipment
- Incontinence supplies
- Pet food
- Pet medication
- Leashes and carriers
- Extra water for animals
A preparedness plan that ignores the needs of the people and animals who actually live in the home is not much of a plan.
How Much Will This Cost?
The total will depend on:
- Household size
- Brands selected
- How much you already own
- Whether you buy everything at once
- Local prices and availability
You do not have to finish the entire list in one trip.
Start with the items that cover the most immediate needs:
- Water
- Food that does not require cooking
- Necessary medication
- Lighting
- First aid
- Sanitation
- Emergency communication
Then add the rest as money allows.
Do Not Store It and Forget It
Preparedness is not a one-time shopping trip.
After bringing everything home:
- Write the purchase date on supplies.
- Store food in a cool, dry, dark place.
- Protect food from insects and rodents.
- Rotate stored food into normal meals.
- Refresh home-filled water every six months.
- Test flashlights, radios, smoke alarms, and carbon monoxide alarms.
- Recharge power banks.
- Inspect medical supplies and medications.
- Practice cooking with your emergency stove outdoors.
- Make sure everyone knows where supplies are stored.
Skills are just as important as supplies.
Learn how to:
- Cook the food you stored
- Treat water
- Use your first-aid kit
- Operate your radio
- Shut off household utilities
- Use a fire extinguisher
- Repair basic problems
- Handle sanitation without running water
The Bottom Line
Prepping has become a major industry.
There will always be someone ready to convince you that survival requires a $5,000 solar generator, a pallet of freeze-dried food, a custom bug-out vehicle, a bunker, and every new tactical gadget advertised online.
Those things may be useful, but they are not where most people need to begin.
Begin with ordinary food, safe water, medication, lighting, sanitation, tools, communications, and a way to cook.
Buy what you use.
Rotate it.
Learn the necessary skills.
Improve the plan as time and money allow.
A cart filled with basic supplies from your local Walmart will not make you completely prepared for every possible disaster.
But it is a whole lot better than an empty pantry and a list of expensive equipment you plan to buy someday.
What would you add to this Walmart prepper checklist? Share your suggestions in the comments below.
Build an Offline Preparedness Library
The Bulletproof Survivor USB drive contains hundreds of preparedness, survival, homesteading, emergency, and self-reliance manuals and reference files that can be accessed without the internet.
Official Emergency Preparedness Sources
- CDC: Creating and Storing an Emergency Water Supply
- CDC: Making Water Safe During an Emergency
- CDC: Cleaning and Disinfecting With Bleach
- CPSC: Carbon Monoxide Safety
- USDA: Shelf-Stable Food Safety
- Ready.gov: Emergency Planning and Supply Kits
Safety Disclaimer
This article provides general preparedness information. Follow all product labels, appliance manuals, medication instructions, local laws, and official emergency guidance.
Never use outdoor fuel-burning camping equipment inside a home, garage, vehicle, tent, basement, or other enclosed area. Never mix bleach with other cleaning chemicals. Seek qualified medical advice concerning medications, medical conditions, allergies, and special dietary needs.
Discover more from The Survivalist Blog by M.D. Creekmore
Subscribe to get the latest posts sent to your email.
I love the lists!
Great lists, M.D.!! Do you have a premade list (not filled out, just a form)? All my stuff is on Publisher, which is being cancelled soon. I won’t even be able to open something I saved.
You should be able to print this article out for reference…