
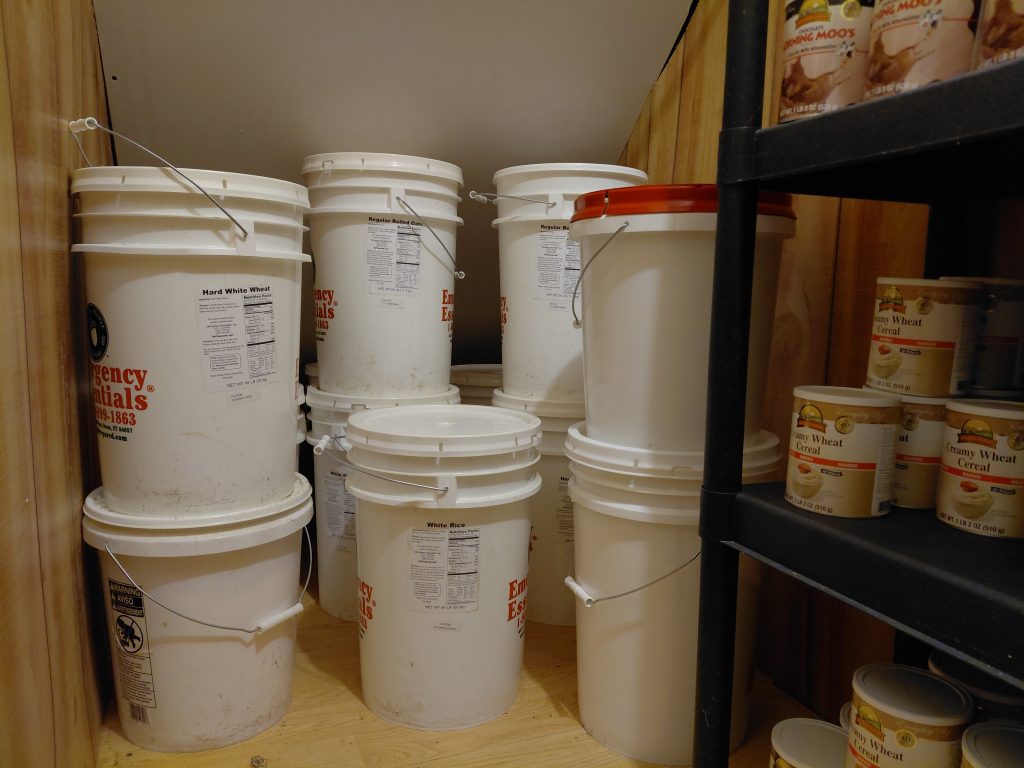
I store most of my long-term dry staples—including wheat, white rice, dry beans, oats, and dried corn—inside sealed Mylar bags protected by five-gallon plastic buckets.
This system is inexpensive, does not require complicated equipment, and can keep properly selected dry foods usable for many years when everything is packaged correctly and stored in a cool, dry place.
However, there is more to it than dumping food into a bucket and snapping on a lid. The food must be dry, the packaging must be appropriate, and the Mylar bag must be properly sealed.
Disclosure: Some links in this article may be affiliate links. If you purchase through one of these links, I may earn a commission at no additional cost to you.
What Foods Can Be Stored This Way?
The bucket, Mylar bag, and oxygen-absorber method works best with dry, low-fat foods such as:
- Hard wheat berries
- White rice
- Dry beans
- Lentils
- Rolled oats
- Dried corn
- Barley
- Dry pasta
- Powdered milk intended for long-term storage
- Other thoroughly dried, shelf-stable foods
Not every dry food is a good candidate for decades of storage. Brown rice, nuts, whole-grain flour, granola, and other foods containing significant amounts of natural oil can turn rancid much sooner.
Whole grains generally store longer than flour because grinding exposes more of the food to oxygen. For example, I would rather store wheat berries and keep a grain mill than attempt to store decades’ worth of ordinary whole-wheat flour.
Do You Need Food-Grade Buckets?
I recommend using new food-grade buckets whenever possible.
Some people assume that every bucket marked with a number 2 recycling symbol is automatically food-grade. That number tells you the general type of plastic—high-density polyethylene—but it does not guarantee that the bucket was manufactured, handled, or previously used for food.
The surest approach is to buy buckets specifically marked or sold for food storage. You can also contact the manufacturer and ask.
Check current prices on food-grade storage buckets.
Bakeries, grocery-store delis, and restaurants will sometimes give away buckets that previously held frosting, pickles, shortening, or other food products. Those can work if they are thoroughly cleaned, completely dry, and still in good condition.
Never use a bucket that previously contained:
- Paint
- Solvents
- Pesticides
- Pool chemicals
- Cleaning products
- Motor oil
- Drywall compound
- Anything else that was not food
Do not assume that putting a Mylar bag inside a contaminated chemical bucket makes that bucket safe. Buckets are cheap. Your health is not.
Why Use Mylar Bags Inside the Buckets?
The plastic bucket provides physical protection. It protects the food from punctures, insects, light, rough handling, and—up to a point—rodents.
The Mylar bag provides the real long-term barrier against oxygen and moisture.
A plastic bucket by itself will not maintain a truly oxygen-free environment indefinitely. Oxygen can gradually pass through ordinary bucket plastic and enter the food.
For long-term storage, I prefer thick Mylar bags without clear viewing windows. Bags approximately 5 to 7 mil thick are more resistant to punctures than the thinner bargain bags.
Check current prices on five-gallon Mylar bags.
The bag should be large enough to line the bucket while still leaving several inches at the top for folding and heat-sealing.
What Oxygen Absorbers Actually Do
Air contains approximately 21% oxygen and 78% nitrogen. Oxygen absorbers remove most of the oxygen from the sealed package, leaving mainly nitrogen behind.
This helps:
- Prevent insects and larvae from surviving
- Slow oxidation
- Preserve flavor and quality
- Reduce rancidity in foods containing small amounts of oil
- Extend the useful storage life of suitable dry foods
Check current prices on food-storage oxygen absorbers.
Do not open the package of oxygen absorbers until you are ready to use them. Once exposed to air, they immediately begin working and can be exhausted surprisingly quickly.
Have the food, buckets, bags, lids, iron, labels, and every other item ready before opening the absorber package.
Place unused absorbers immediately into a small glass canning jar with a tight-fitting lid. Use the smallest jar that will hold them so there is as little trapped air as possible. You can also reseal them inside a small Mylar bag.
Important Safety Warning
Oxygen absorbers are intended for foods that are already thoroughly dry and shelf-stable.
Do not use oxygen absorbers to package moist foods, partially dried foods, fresh vegetables, fresh meat, or anything that normally requires refrigeration.
Removing oxygen from moist, low-acid food can create conditions that allow Clostridium botulinum to grow and produce the toxin that causes botulism.
As a general rule, foods packaged with oxygen absorbers should contain approximately 10% moisture or less. Home-dehydrated food must be completely and evenly dried before it is placed into reduced-oxygen packaging.
How Many Oxygen Absorbers Should You Use?
The correct amount depends on:
- The size of the bag
- The amount of empty space around the food
- The density of the food
- The absorber manufacturer’s recommendations
A five-gallon bag filled with wheat or rice has less trapped air than the same bag filled with macaroni or another bulky food.
A 2,000 cc oxygen absorber is commonly sold for five-gallon bags, but do not assume that one packet is automatically correct for every situation. Follow the sizing chart supplied by the absorber manufacturer. Using a little more capacity than necessary is generally better than not using enough.
How to Package Dry Food for Long-Term Storage
1. Inspect the Food
Begin with clean, dry food from a dependable source.
Do not package anything that is damp, moldy, discolored, infested, or has an unusual smell. Long-term packaging will not improve poor-quality food.
Do not use seed grain intended for planting unless you know it has not been treated with pesticides, fungicides, or other chemicals.
2. Prepare the Equipment
Before opening the oxygen absorbers, gather:
- Clean, completely dry buckets
- Mylar bags
- Oxygen absorbers
- Bucket lids with intact gaskets
- A household iron, hair straightener, or impulse sealer
- A smooth board to use as a sealing surface
- A permanent marker or printed labels
A clean 2×4 board placed across the top of the bucket makes a convenient surface for sealing the bag with a household iron.
3. Line the Bucket
Place the Mylar bag inside the bucket and spread it open. Push the bottom of the bag gently into the bottom corners of the bucket.
Be careful not to puncture the bag with a sharp edge, splinter, fingernail, or piece of food.
4. Fill the Bag
Pour the food into the bag gradually. Shake or tap the bucket occasionally so the contents settle and fill empty spaces.
Do not fill it all the way to the rim. Leave enough bag above the food to make a wide, dependable heat seal.
For foods that you use regularly, consider dividing the food among several smaller Mylar bags and placing those bags inside one bucket. That way, you do not expose an entire five-gallon supply every time you need more food.
5. Add the Oxygen Absorber
Wipe any food dust from the inside sealing area of the bag.
Place the correctly sized oxygen absorber on top of the food. There is no need to bury it.
Work steadily after opening the absorber package, but do not panic. Have everything organized so you can add the absorbers and seal the bags without unnecessary delay.
6. Remove Excess Air and Seal the Bag
Press out as much excess air as you reasonably can without crushing the food.
Lay the top of the Mylar bag across the smooth board. Use a household iron, hair straightener, or impulse sealer to create a continuous seal across the bag.
The correct heat setting varies depending on the thickness and manufacturer of the bag. Test a corner first. The seal should fuse the layers together without burning through them.
I prefer making a seal approximately one inch wide. You can also make a second seal above the first one for additional protection.
Leave a little unused material above the seal. If you ever need to open the bag, that extra material may allow you to reseal it.
7. Inspect the Seal
Allow the seal to cool, and then inspect the entire width.
Look for:
- Wrinkles crossing through the seal
- Food particles or dust trapped in the sealing area
- Thin spots
- Open corners
- Punctures in the bag
Do not depend entirely on whether the bag becomes hard or appears vacuum-packed. Some bags pull tightly around the food while others remain somewhat loose, depending on the amount of air and the shape of the contents.
The important thing is a complete heat seal and an oxygen absorber with enough capacity for the package.
8. Close the Bucket
After the Mylar bag is sealed, fold the excess material down carefully and install the bucket lid.
For long-term sealed storage, I prefer a standard gasketed lid that can be driven firmly into place with a rubber mallet.
Gamma-style lids are convenient for buckets that are opened regularly, but I usually reserve those for my working supply rather than buckets I intend to leave untouched for years.
9. Label Everything
Use a permanent marker or printed label to record:
- The name of the food
- The packaging date
- The approximate weight
- The oxygen-absorber size
- Any cooking instructions you may need
Write the information on both the Mylar bag and the outside of the bucket. Bucket lids can get switched, and labels can fall off.
Do Not Use Oxygen Absorbers With Sugar
Granulated sugar can be stored in a tightly sealed, moisture-proof container, but I do not add oxygen absorbers.
An oxygen absorber can cause granulated sugar to become an extremely hard block. The sugar may still be usable after being broken apart, but there is no advantage in creating that problem.
Keep sugar dry, sealed, and protected from odors and insects.
Salt also needs protection from moisture but does not require oxygen-free storage.
Foods With Shorter Storage Lives
Removing oxygen does not stop every form of deterioration.
Foods with higher fat or oil content usually have shorter storage lives, including:
- Brown rice
- Whole-grain flour
- Nuts
- Sunflower seeds
- Granola
- Most boxed mixes containing shortening
- Dry pet food
Store foods you actually eat and rotate the shorter-lived items regularly. Do not package something for 20 years merely because someone on the internet claims it will last that long.
Where to Store the Finished Buckets
Store finished buckets in a place that is:
- Cool
- Dark
- Dry
- Protected from freezing
- Away from gasoline, pesticides, paint, and household chemicals
- Safe from rodents
Temperature makes a major difference. Food stored in a cool basement or interior room will usually maintain its quality much longer than food stored in a hot garage, attic, vehicle, or metal shed.
Keep the buckets off damp concrete floors by placing them on sturdy shelving, boards, or pallets.
Opening and Rotating Your Stored Food
Long-term food storage should not be treated like a museum exhibit.
Store what you eat, eat what you store, and replace what you use.
When you open a bucket, inspect the food before using it. Do not eat it if you find:
- Moisture inside the bag
- Mold
- An unusual or rancid smell
- Insect activity
- Discoloration that cannot be explained
- A damaged seal
Once a Mylar bag is opened, transfer the food to smaller airtight containers or reseal the bag with a new oxygen absorber if continued long-term storage is necessary.
The Bottom Line
The bucket, Mylar bag, and oxygen-absorber method is one of the simplest and most affordable ways to protect dry staple foods.
Remember the purpose of each part:
- The food-grade Mylar bag provides the oxygen and moisture barrier.
- The oxygen absorber removes oxygen trapped inside the sealed bag.
- The bucket protects the bag from punctures, light, insects, rodents, and physical damage.
Use thoroughly dry foods, size the oxygen absorbers correctly, make a dependable heat seal, label everything, and keep the finished buckets somewhere cool and dry.
Do that, and you will have a supply of staple foods that can help carry your family through shortages, rising prices, job loss, natural disasters, and other hard times.
What foods do you store in buckets, and what long-term food-storage tips have worked for you? Add your thoughts in the comments below.
Discover more from The Survivalist Blog by M.D. Creekmore
Subscribe to get the latest posts sent to your email.
Leave a Reply