
When the garden is finished for the season and fresh vegetables are expensive, sprouts are one of the easiest ways to add something fresh to your meals.
You do not need a greenhouse, grow lights, potting soil, or much room. A quart jar sitting on the kitchen counter is enough to produce fresh sprouts throughout the year.
Sprouting will not magically create more calories, but it does greatly increase the volume of the original seed and gives you a fresh food to go along with the rice, beans, wheat, and other dry staples in your food storage.
What You Will Need
- To get started, you will need:
- A clean, wide-mouth quart canning jar
- A piece of nylon window screen, cheesecloth, or a sprouting lid
- A canning-jar ring, large rubber band, or string
- Clean water
- Seeds intended for sprouting
A quart mayonnaise jar or similar glass jar will also work as long as it is thoroughly cleaned and has a wide enough opening.
Cut the nylon screen or cheesecloth into a square large enough to cover the mouth of the jar. Secure it with the jar ring, rubber band, or string. A purpose-made sprouting lid is more convenient, but it is not necessary.
Choosing Seeds for Sprouting
Common choices include:
- Alfalfa
- Broccoli
- Clover
- Radish
- Lentils
- Mung beans
- Chickpeas
- Green peas
- Wheat berries
- Rye berries
Use clean seed sold for sprouting or human consumption. Do not use garden seed that may have been treated with fungicides, pesticides, or other chemicals.
Not every edible seed is suitable for eating as a raw sprout. In particular, do not eat raw or undercooked kidney beans. Raw kidney beans contain a naturally occurring toxin that must be destroyed by proper cooking.
For a quart jar, start with approximately two tablespoons of small seeds such as alfalfa, broccoli, or radish. You can use up to about one-quarter cup of larger seeds or beans. It may not look like much, but the jar will fill quickly once the seeds begin sprouting.
Overfilling the jar restricts airflow and makes it harder to drain the sprouts properly.
Step 1: Soak the Seeds
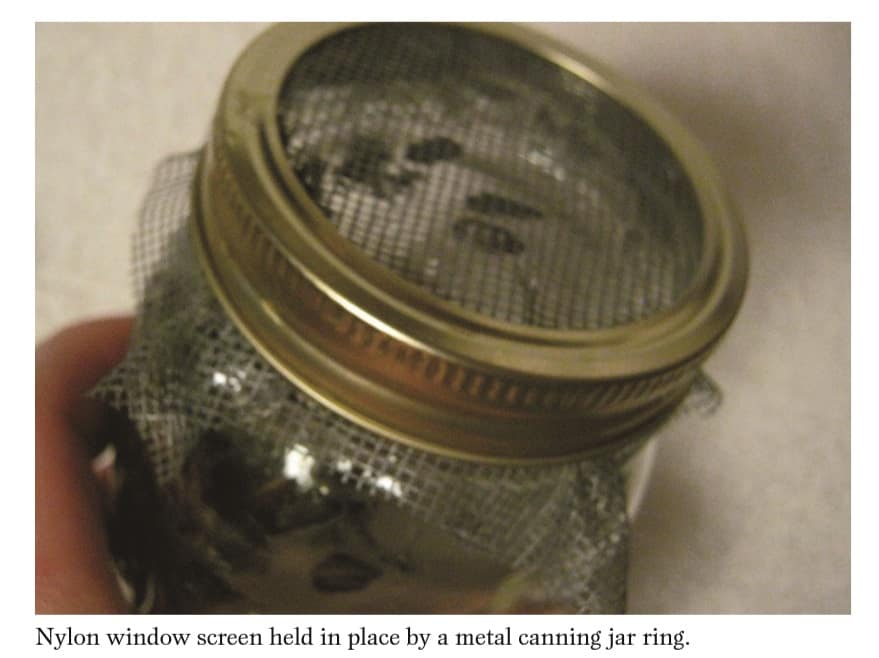
Put the seeds in the jar and rinse them with clean, cool water.
Drain that water, refill the jar approximately halfway, and allow the seeds to soak for 8 to 12 hours. I usually do this before going to bed and drain them the following morning.
The seeds should remain completely covered during this initial soaking period.
Step 2: Drain the Jar
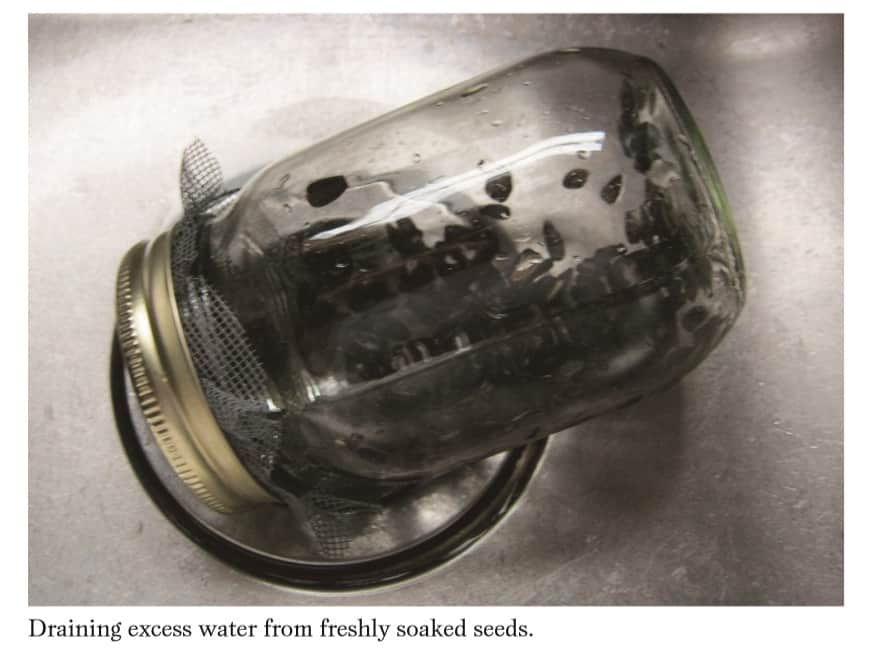
The next morning, pour out the soaking water through the screen or sprouting lid.
Drain the seeds thoroughly. After most of the water has drained, place the jar at an angle with the opening facing downward. A bowl, dish rack, or inexpensive sprouting-jar stand works well.
The idea is to allow excess water to escape while still letting air circulate through the jar.
You want the seeds damp, but you do not want them sitting in standing water.
Step 3: Rinse Two or Three Times a Day
Fill the jar with fresh water, swirl it gently, and drain it completely.
Repeat this two or three times each day. Morning and evening are generally enough for many varieties, although an extra rinse during hot weather may be helpful.
Keep the jar at normal room temperature and out of direct sunlight. Too much heat can encourage spoilage.
A couple of tablespoons of seed, an 8-to-12-hour soak, and twice-daily rinsing are standard starting points for jar sprouting.
Step 4: Watch Them Grow
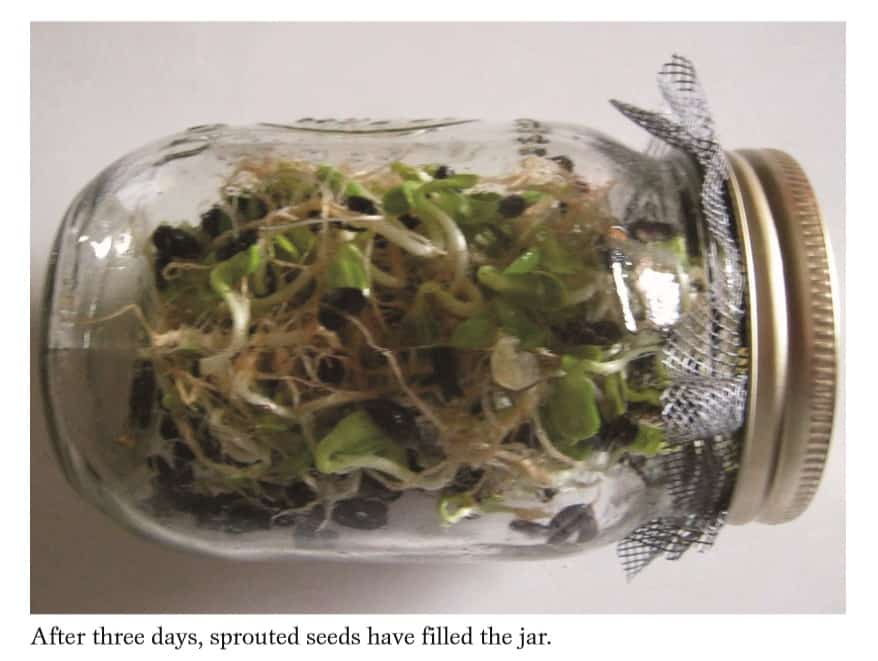
Depending on the type of seed and the temperature in your home, you should begin seeing small roots within a day or two.
Most sprouts will be ready in approximately three to seven days. Larger beans may be ready sooner, while some smaller seeds take longer.
For many varieties, the sprouts are ready when they are around one to two inches long. Sprouted grains do not need to grow that long. A short root emerging from the grain may be all you want.
During the final day, you can move the jar into indirect light if you want the leaves to turn greener. Do not place the jar in hot, direct sunlight.
Step 5: Harvest and Store the Sprouts
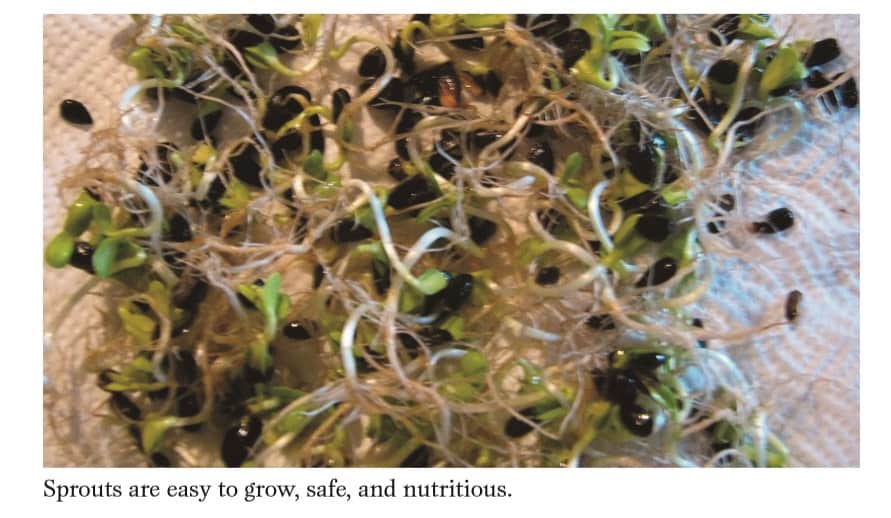
Give the finished sprouts one final rinse and drain them thoroughly.
The drier they are before refrigeration, the better they will keep. You can spread them on a clean towel for a short time to remove excess moisture.
Place the sprouts in a clean container and refrigerate them promptly. Keep your refrigerator at 40°F or below.
Use the sprouts within several days. Throw them away if they become slimy, develop mold, or have an unpleasant or sour smell. When in doubt, throw them out. A few cents’ worth of seed is not worth getting sick over.
How to Use Fresh Sprouts
Sprouts can be added to:
Salads
Sandwiches
Wraps
Scrambled eggs
Soups
Stir-fries
Rice and bean dishes
Homemade bread
Mung bean sprouts and larger sprouts are especially good in stir-fries. Add them near the end of cooking so they retain some texture.
Sprouted wheat and other grains can also be dried and ground into flour. However, they must be dried completely before storage. Any remaining moisture can lead to mold or spoilage. Unless you have a dependable dehydrator and know the grain is completely dry, it is easier and safer to use sprouted grains fresh and cook them soon after sprouting.
Keeping a Steady Supply
To maintain a continuous supply, begin another jar every 24 to 48 hours.
For example, start one jar on Monday, another on Wednesday, and another on Friday. By the time you finish eating the first batch, the next batch should be nearly ready.
Once you establish the routine, it only takes a few minutes each day.
This is one of those preparedness skills that is cheap, useful, and easy to practice before you ever need it. Instead of waiting until the stores are empty or fresh produce becomes unaffordable, learn the process now while mistakes do not matter.
An Important Food-Safety Warning
Raw sprouts have been connected to outbreaks of foodborne illness. The same warm, damp conditions that cause seeds to germinate can also allow bacteria such as Salmonella and E. coli to multiply.
Even sprouts grown at home can carry bacteria if the original seed was contaminated. Washing and rinsing reduce dirt but cannot guarantee that contaminated sprouts are safe because bacteria can be inside cracks in the seed.
Children younger than five, adults 65 and older, pregnant women, and people with weakened immune systems should avoid eating raw or lightly cooked sprouts. Thorough cooking reduces the risk.
I am not saying this to scare anyone away from sprouting. I am saying to use clean equipment, buy quality sprouting seed, drain the jars thoroughly, refrigerate the finished sprouts, and understand that raw sprouts are not completely risk-free.
Final Thoughts
That is really all there is to it.
With a jar, a small amount of seed, and a few minutes of attention each day, you can produce fresh sprouts in the middle of winter without soil, fertilizer, or expensive equipment.
For additional information and recipes, The Sprouting Book by Ann Wigmore is a useful resource for anyone who wants to go deeper into growing and using sprouts.
Discover more from The Survivalist Blog by M.D. Creekmore
Subscribe to get the latest posts sent to your email.
Leave a Reply